Starting Plants from Seeds Indoors
February 23, 2024 at 10:31 a.m.
Keep your green thumb in shape this winter while getting a jump on the growing season by starting your favorite or hard-to-find plants indoors. It’s fun, simpler than you think, and can help stretch your plant budget.
Start with some clean containers that you purchase, recycle, or make from newspapers. Be sure to add drainage holes to any repurposed yogurt or similar containers you are using for starting seeds to avoid waterlogged soil. Always clean used pots by soaking them in a one-part bleach and nine-part water solution for ten minutes then rinse with clear water. This helps reduce the risk of disease.
Fill the containers with a moist well-drained potting mix or a sterile seed starting mix. Once the containers are filled, check the back of your seed packets for planting directions. Most contain all the information you need for when and how to plant the seeds. Some seed companies now provide this information on their website instead of the seed packets.
Most seeds are planted about twice the seed diameter deep while smaller seeds are often set on the soil surface and gently watered in place. Once again, check the seed packet for the seeds you are growing. Plant two seeds per container just in case one of the seeds fails to sprout.
Once planted, move the containers to a warm location. Many gardeners use heating pads designed for germinating seeds to help speed sprouting. Covering the containers with a sheet of plastic or one of the prefab domes will help conserve moisture so you will need to water less often.
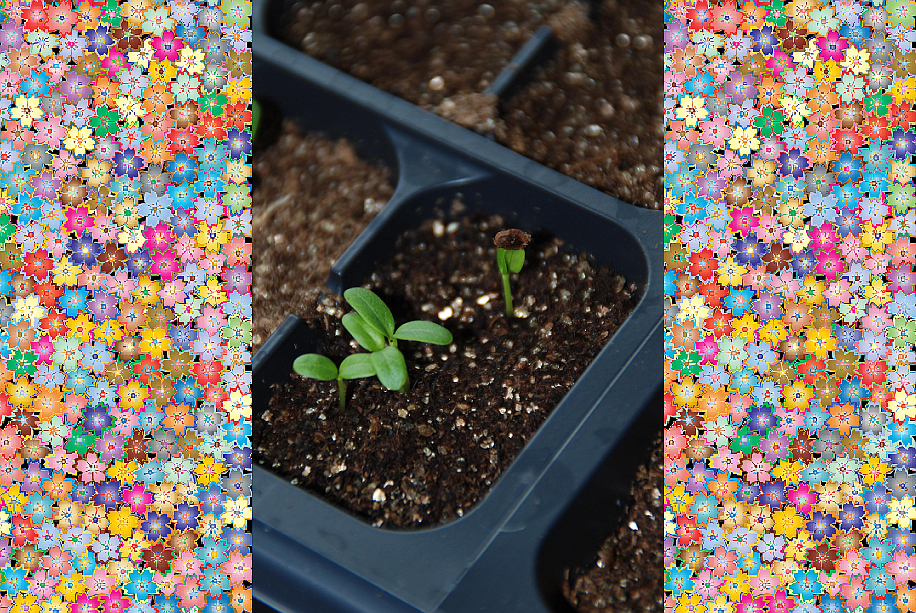
Check the soil moisture daily and water often enough to keep the soil evenly moist but not soggy wet. Remove the plastic and move the containers to a sunny window or better yet, under artificial lights as soon as any green appears.
Regularly rotate plants that are growing in sunny windows to promote more even growth. Adjust artificial lights as plants grow. Most seedlings benefit from keeping the lights four to six inches above the top of the seedlings. Leave the lights on for 14 but no more than 16 hours a day. Using a timer is an easy way to make sure the plants receive the right amount of light each day.
Once the seedlings develop two sets of true leaves (these will look like the leaves of the plants you are growing), it is time to do some thinning. Remove the weakest seedling in each pot so only one strong seedling remains. Trimming the weaker seedlings back to ground level instead of pulling avoids damage to the remaining seedling.
Once seedlings have been thinned and are actively growing, use a fertilizer labeled for this use. Continue to water thoroughly and often enough to keep the planting mix slightly moist but not soggy wet.
Check the weather and seed packet to determine when it is safe to move your plants outdoors. You’ll need to prepare them for their new home outdoors with a technique called hardening off. Start by moving the plants to a sheltered and shaded location after the danger of frost has passed. Stop fertilizing, and check soil moisture daily but allow it to dry just slightly before watering thoroughly.
Gradually increase the amount of sunlight the plants receive each day. Cover or move them indoors when frost is in the forecast. Your transplants are ready to move to their permanent location after a week or two.
Start gathering your supplies and seeds now. And before you know it, you will be enjoying the beautiful blooms and tasty vegetables you started from seed yourself.
Melinda Myers has written more than 20 gardening books, including Midwest Gardener’s Handbook, 2nd Edition and Small Space Gardening. She hosts The Great Courses “How to Grow Anything” instant video and DVD series and the nationally syndicated Melinda’s Garden Moment radio program. Myers is a columnist and contributing editor for Birds & Blooms magazine. Myers’ website is www.MelindaMyers.com.
Latest Stories


Medical Minutes
This month's Medical Minutes looks at staying healthy while traveling by plane; the hidden health benefits of prostate medication; how honeybees can help diagnose lung cancer
READ MORE...
Do You Need a Digital Will?
Adding a separate digital will document to your estate plan that provides a list of your digital assets would be extremely helpful to your loved ones
READ MORE...
