Learn how to make fresh cheese and get cheesy!
September 2, 2014 at 7:31 a.m. | Updated September 2, 2014 at 7:31 a.m.
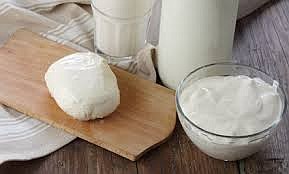
Making your own cheese sounds so intimidating. But just like making bread, the ingredients are simple and the method is easy. It just takes a little time. Homemade cheeses are terrifically fresh and much lower in salt than anything you can buy. Lack of salty preservatives makes them much healthier for your kidneys and heart.
For equipment, all you need is a thermometer, a strainer, and some cheesecloth. Citric acid is often available in the bulk spices section of a grocery store. You can find rennet at a local brewing store like The Cellar Homebrew or search for it online.
Fresh Cheese
1 gallon whole milk, not ultra pasteurized
1/4 cup white or cider vinegar
Pour the milk into a large pot. Stir constantly to prevent scorching. When the milk reaches 195 degrees, remove from heat. Stir in vinegar. Let stand for 10 minutes. The milk should separate into a white solid part (curds) and a yellowish liquid (whey).
Line a strainer with cheesecloth. Pour the milk through the strainer and let the curds drain for one hour. Then pat them into a ball and remove from the cheesecloth. Wrap in plastic and store in the refrigerator. (You can dump out the whey or keep it to use as plant fertilizer.) Fresh cheese will last about a week.
Quick Mozzarella
1 gallon milk, not ultra pasteurized
1 1/2 teaspoons citric acid
1/4 teaspoon liquid rennet
Set a large pot in sink full of warm water. In the pot, mix the citric acid with the milk. The temperature should be steadily rising. When it reaches 88 degrees, stir in the rennet, using an up-and-down motion, continuing to heat to 100-105 degrees. Add more hot water to sink if needed. Curds and whey will form. Let set for 10 minutes, then ladle out the curds with a slotted spoon and put in a microwave-safe bowl. Press gently, pouring off the whey.
Microwave for one minute and knead with your hands. Microwave two or three more times for about 30 seconds each, kneading after each time. You may need to use rubber gloves to protect your hands from the heat. Keep kneading until smooth and elastic. When cheese stretches like taffy, it’s done. If it breaks, it’s too cold and needs to be reheated. When smooth and shiny, roll into balls and eat warm, or place in ice water for 30 minutes to give a smoother texture. To store, put in leftover whey. It will keep for a day or two in the refrigerator.
A note about nutritional value: These recipes are significantly lower in sodium than regular prepared cheeses, since you do not add salt to them. It’s difficult to say how much lower they are, since it’s hard to estimate how much natural sodium from the milk is lost in the whey. For this reason, we have not done a nutritional analysis of these recipes, but they are significantly lower in sodium than any cheese you buy.
The information in this column is meant for people who want to keep their kidneys healthy and blood pressure down by following a low-sodium diet. In most cases, except for dialysis patients, a diet high in potassium is thought to help lower high blood pressure. These recipes are not intended for people on dialysis without the supervision of a registered dietitian.
[Katy G. Wilkens is a registered dietitian and department head at Northwest Kidney Centers. The 2014 recipient of National Kidney Foundation Council on Renal Nutrition’s Susan Knapp Excellence in Education Award, she has a Master of Science degree in nutritional sciences from the University of Washington. See more of her recipes at www.nwkidney.org.]
Latest Stories

Cantaloupe and Melons Pack a Healthy Punch
Eating cantaloupe and other melons on a regular basis may help improve your vision and provide a host of other health benefits
READ MORE...
Where To See Wildflowers — And Avoid the Crowds
So, if you want to sing “The Hills Are Alive…” to the birds, rodents and you don't want to fight for parking or have hordes of people in your photos, here are the trips for you
READ MORE...
Volunteers Essential to Protecting Elders in Long Term Care
The Washington State Long-Term Care Ombudsman Program advocates for the rights of residents living in long term care
READ MORE...
55+ Travel Club
Be on the lookout for news about an exciting new Northwest Prime Time venture, the Northwest Senior Travel Club
READ MORE...